
Description
Mounting Solar on a Tile Roof — Without Breaking Tiles
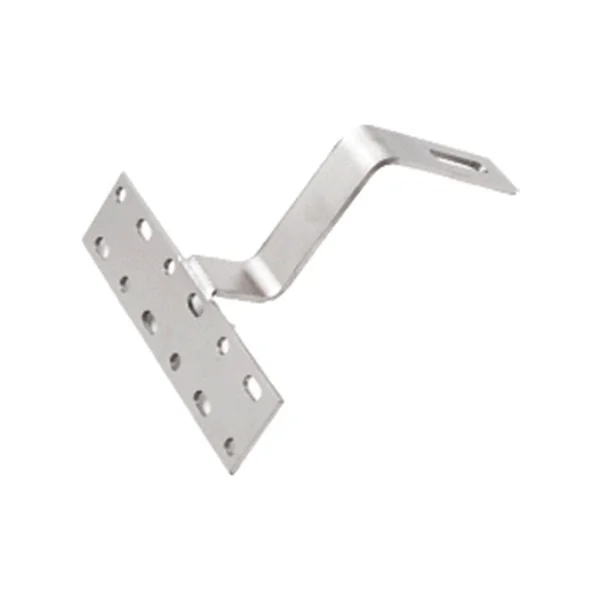
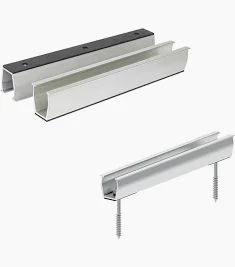
Tile roofs present a specific challenge for solar mounting that metal roofs do not. On a mabati or IBR sheet roof, you can fix an L-foot straight through the sheet into the purlin below. You cannot do that on a tile roof — clay and concrete tiles are brittle, and drilling or bolting directly through them cracks the tile, voids the roof’s weatherproofing, and leaves the panel poorly anchored to material that was never meant to carry structural load. The tile roof hook solves this by bypassing the tile entirely.
The hook works by reaching past the tile to the structural timber underneath. You lift the tile in the course above the fixing point, bolt the hook’s base to the rafter or batten beneath, then lower the tile back over the hook. The hook’s stepped profile is shaped to clear the curve of the tile so the tile sits back down naturally without being forced or cracked. The upper arm of the hook then protrudes just above the tile surface, presenting a bolting plate that the solar mounting rail attaches to. The load path runs from panel, to rail, to hook, to rafter — never through the tile.
Why This Hook Is for Profiled Tiles Specifically
Clay and concrete profiled tiles — the curved, interlocking tiles seen on a large share of Kenyan pitched-roof homes — have a distinctive wave contour. A roof hook for these tiles must have a stepped or cranked shape that follows that contour, so the tile above can close back over the hook without sitting proud or rocking. This hook is shaped for exactly that profile. Using a flat-tile hook, or an improvised bracket, on a profiled tile roof leaves the overlying tile lifted or unsupported, which breaks the weather seal and invites leaks. Matching the hook to the tile profile is what keeps the roof watertight after the solar goes on.
Why Fixed, and Why SUS 304
This is a fixed (non-adjustable) hook, which suits the consistent tile profile and rafter depth of a typical profiled-tile roof — the fixing geometry is predictable, so adjustability adds cost without adding value. The fixed design is also inherently stronger, with no adjustment slots to introduce a weak point under load.
The material is SUS 304 stainless steel, and on a tile hook that choice is more important than on almost any other mounting component. The hook is permanently embedded under the tile, where it can never be inspected, cleaned, or easily replaced once the roof is closed back up. A hook made from plain or galvanised steel would eventually corrode in that damp, enclosed under-tile environment, and by the time the corrosion showed itself the only fix would be lifting the solar array and the tiles to reach it. SUS 304 stainless steel resists that corrosion for the full 25-year-plus life of the installation, so the buried hook never becomes the weak link.
Technical Specifications
| Specification | Detail |
|---|---|
| Type | Fixed solar tile roof hook |
| Tile Compatibility | Clay and concrete profiled (curved interlocking) tiles |
| Material | SUS 304 stainless steel |
| Profile | Stepped/cranked to clear the tile contour |
| Fixing Point | Rafter or batten beneath the tile course |
| Rail Connection | Bolted top plate accepting standard rails and T-bolts |
| Fixing Hardware | Wood screws / coach screws into the rafter (supplied) |
| Corrosion Resistance | Marine-grade — suitable for coastal and high-humidity zones |
| Load Path | Panel → rail → hook → rafter (never through the tile) |
| Service Life | 25+ years embedded, matching panel and rail lifespan |
How Many Tile Hooks Does Your Installation Need?
Tile hooks replace L-feet on a tile roof, so the quantity follows the same logic — one hook at each point where a rail anchors to the roof. For a standard layout, that is roughly four anchor points per panel (two rails, two anchor points each beneath the panel).
| System Size | Panels | Tile Hooks (approx.) |
|---|---|---|
| 3 kW | 6 panels | 24 hooks |
| 5 kW | 10 panels | 40 hooks |
| 7 kW | 14 panels | 56 hooks |
| 10 kW | 16-18 panels | 64-72 hooks |
On longer rail runs where anchor points can be shared between adjacent panels, the count drops slightly. For an exact figure, our solar calculator works out the anchor count for your specific roof and layout.
Installation Overview
- Locate the rafters. Hooks must fix into structural timber, not into the tile battens alone where the load would be inadequate. Identify rafter positions before setting out the rail lines.
- Lift the tile. Carefully raise the tile in the course above each fixing point, and the one interlocking with it, to expose the rafter beneath.
- Fix the hook base. Screw the hook’s base plate to the rafter with the supplied coach screws, ensuring it sits flat and solid.
- Check the clearance. Confirm the hook’s stepped arm clears the tile profile so the lifted tile can return to its natural seated position.
- Re-lay the tile. Lower the tile back over the hook. It should interlock and seat normally, with only the hook’s upper arm protruding.
- Mount the rail. Bolt the solar mounting rail to the hook’s top plate using a standard T-bolt, then proceed with panel clamping as on any other roof.
A correctly installed tile hook leaves the roof as watertight as it was before, with the solar load carried entirely by the structural timber.
Completing Your Roof-Type Coverage
Different Kenyan roofs need different anchoring. With the tile hook added to the range, every common roof type is covered:
- Mabati and IBR sheet roofs: use our solar L-foot screw kit, which fixes through the sheet into the purlin with an EPDM weather seal
- Clay and concrete profiled tile roofs: use this tile hook, fixing to the rafter beneath the tile
- Concrete flat roofs: the L-foot screw kit with concrete anchors
Whatever the roof, the rails, clamps, and splices above the anchor are the same standard components.
Cross-Sell: The Rest of the Mounting System
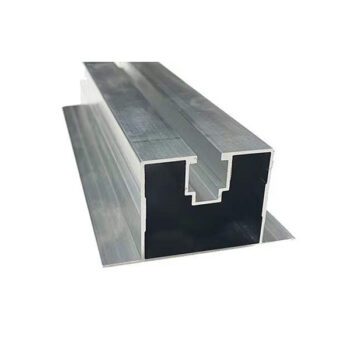
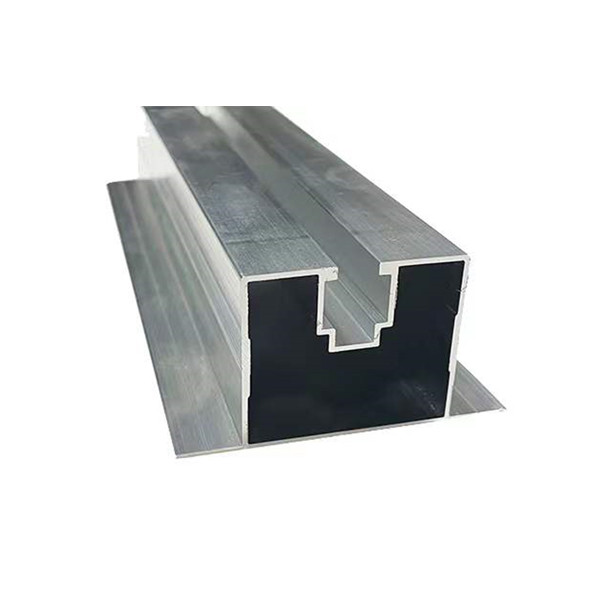
- Mounting rails: 4800mm and 4400mm rails that bolt to the hooks
- Rail splice: CP-RS-A rail splice for joining rails into longer spans
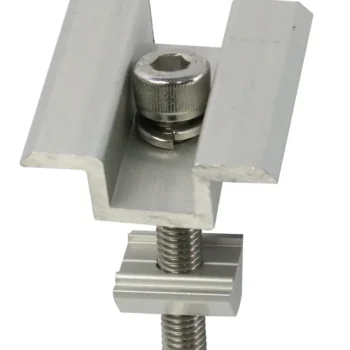
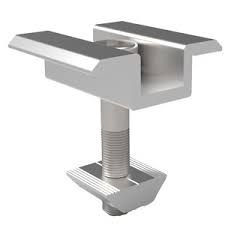
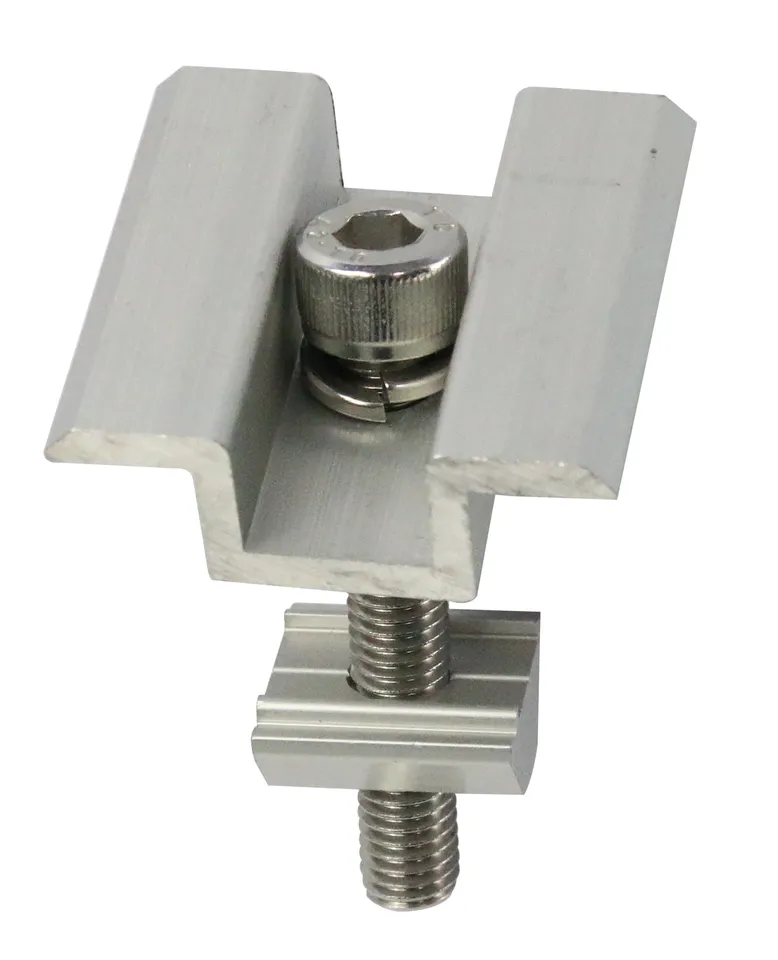
- Panel clamps: 35mm and 40mm mid-clamps, plus matching end-clamps
- Metal-roof anchoring: solar L-foot screw kit for mabati and IBR roofs
- Full bill of materials: use our solar calculator or request a quote
